Pages

Tuesday, January 19, 2021

I'm back!

Nothing like picking up right where I left off, about four years ago, to get back at it. Things that have happened since I last posted:

  1. Changed jobs and learned a ton professionally
  2. Joined a local service organization
  3. Got engaged
  4. Dealt with losing a baby
  5. Bought a house
  6. Dealt with losing another baby
  7. Got married
  8. Refinished a ridiculous amount of furniture for said house
  9. Survived COVID (mostly)
It's been a long journey of mental health struggles and learning about myself since I last blogged. I now work at the same job, but from home (almost a whole year now! 309 days to be exact). Which has fostered my creativity again. I'm no longer going out and doing things as much, and my now husband has crazy hours, which means I like to feel accomplished by finishing crafts. But in all honesty, when your craft space IS your office space, there are no excuses.

My goals over the next year:
  1. Actively participate in the #ObservatoryBOM quilt (my first block of the month)
  2. Work on a LOT of UFOs
  3. Update this blog with all my accomplishments since 2017
  4. Maybe look into the local quilt guild?
My passion has always been being crafty so I need to keep that in my life now more than ever.

Tuesday, December 19, 2017

Never Ending Gallery Wall Project

It's been 7 months since I last published a post. Life is still crazy (understatment! 2017 has been the most challenging year I've ever endured), but now it's because I have an awesome new job and not because I'm commuting for three hours a day. Somehow, even with all the extra time I had once my commute changed, I really didn't work on a whole lot of projects.

I did however finish a two and a half year project finally came to fruition when we moved to our new place. My focus and effort towards this project were severely lacking for entirely too long (like the entire two years in the old place) and then one day all the ideas just clicked into place. I absolutely love the idea of a gallery wall, which I decided was exactly the way to showcase all the cool craft pieces and pictures we've acquired and all of our wonderful pictures. I even received some nice canvas pictures for Christmas (two years ago...) which had yet to find their place on our walls.

Once I decided I was going to work on this project when we first moved into our old place in the summer of 2015, I began collecting picture frames. Out of date metal? Doesn't matter and it is cheap from a resale shop, which sounds great! Cool texture? Wonderful! I started out with only a few frames I picked up randomly... 

I spent around $16.50 for all these frames, which are all solid and functioning wonderfully.

And since nothing matched I decided that spray painting them would be the best option in addition to the fact that I planned to supplement these with plain black frames. I'm not a fan of matte black so I went with a gloss finish. Here was step one of the many rounds of spray paint:

They look so strange from this picture but they will look so pretty when I am done :)

The wooden frames were of course much easier to spray-paint. The paint stuck well and didn't look gloppy or runny, but it did take multiple coats. I decided after that I was going to go the really cheap route and get plastic frames for a nice low price since I didn't really care about the quality of the frames. But once I got the frames (a whole $7 for a lot of frames...) I realized the blacks didn't look the same and that irritated the perfectionist in me. So I decided to spray-paint those frames too. But those frames needed more paint in little, even coats to look nice, and then I found other frames to add to the mix... and on my garage floor they stayed. And stayed... for almost two full years. 

Then I began to collect other things as well. The picture below was stage 2 of like 8 within the brainstorm process. I laid everything I had out on the floor, which gave me great ideas about how they could all fit together and where I was still lacking. The wooden sign was given to us for Christmas last year, the "R & C" I made a while back and kept adding wine corks to, the pictures are honestly a little old now but were printed and ready to go. I realized that this would be the perfect opportunity to showcase my partner's flag and picture from when he was in the military since we have absolutely nothing from then up either (pictured at the bottom left).

Getting closer!

After spending time (okay like hours wondering....) at Michael's I knew I found the right details to fill in some of the gaps. Once I figured out the right arrangement I had to figure out how to get everything up on the wall in order with decent spacing. The good thing is that I really don't think a gallery wall is supposed to be perfect. I did measure a lot of these items, to figure out proximity and to make sure my wall didn't end up with everything in the corner and nothing on the other side.

 
Finally the right fit!

Once I started getting everything up, it was quick moving because everything was around the same height. I moved things in sections, the umbe board column first, then the next column with the red shirt picture. The harder part was the "R & C" section. I had to treat it as just one since the sections overlapped with each other. And then the last section I was about 3 hours into trying to figure all of this out and so I pretty much threw it on the wall as quickly as possible.

Finally up on the wall!

And the finished project! (with our new couch and pillows!!)

The perfect mix of all my favorite things :)

Wednesday, May 31, 2017

Updates on My Life

I realized, as I just posted the Sunbonnet Sam/Sue post about three months after I completed the project, that I haven't posted ANYTHING in three months! It has been a super crazy few months for me.

In February, my partner accepted a new job in a town 1.5 hours away from where we used live. Since that time, he's commuted for about a month, we moved to a new place, I've job searched, and now I commute since my search hasn't been as fruitful as his.

My new craft space is much bigger than my former space, but it is in the cool basement. I haven't found my motivation to get down there and work, and my desk contents still adorn the floor--where I left them after getting frustrated that I couldn't find something in the box that was still all packed up.

Now that we're all moved in (and actually at a place where I feel organized and like this place is more of my "home"), I'm back on track with my craft goals... though I still commute three hours a day and don't exactly have the kind of time that I used to. This weekend I am determined to start working on some more projects!

We'll see if it works out like I planned or not :)

Updates on Sunbonnet Sue/Sam Quilt

I bought this quilt a year ago from my guild's annual auction....


"I purchased two partial quilts as well.  The first one is really an interesting quilt. The previous owner clearly started hand quilting at the top. They added Sunbonnet Sue/Sam patterns to the middle of the blocks. Also, they had a fun time experimenting with fabric. Some of the blocks are old fashioned-type fabric, others have all one color fabric or metallic-typed fabric. Many of the blocks have fabric that I recognized from my grandmother's stash as well.  There is really nice batting in the middle and a neutral backing. I might add to the sides a bit to make it wide enough for a queen sized bed because right now this is a very square quilt and if I tried to use it on my own queen bed my partner and our dogs would end up with all the blanket!"


I realized after I purchased the quilt that I should've done a better job investigating what was really all there. During the silent auction, the quilt was wrapped up so that only part of the quilt was really showing. Though the quilt still works perfectly fine, my natural OCD tendencies are not a fan of the odd blocks scattered throughout.

I didn't end up adding anything to the sides, and I actually decided that this quilt was going to live just as the person who previously owned this quilt left it. Enough of the quilt is completed with hand quilting to keep the quilt together. No it's not perfect by any means, and one day when I find some energy to hand sew the sunbonnets into the middle of the already quilted sections, I might do it.


Until that point, sunbonnet sue/sam will adorn my couch, floor, car seats, beds, etc.
Here it adorns my legs, keeping me warm

one of the completed sunbonnet sam/sues

the finished product


Thursday, February 23, 2017

Bathroom Sign

This project has literally been on my list for months. Maybe even since I started the blog actually. I think this project really came to fruition in September 2015... when I first bought the board that I planned to do something with for my bathroom. I bought it purely on a whim, not on sale *gasp*, with the idea that I'd hopefully do something with it sometime. My style is very reclaimed meets industrial meets old farm house. I love anything that looks distressed or like I saved it from the burn pile. This isn't quite getting there with it's perfect edges and uniform color (hey I bought it at walmart after all....) but I did really like the gray "barn wood" color.

And so it sat. And sat. And then I moved it upstairs, downstairs and upstairs again from closet to closet until I just actually found the motivation to do what I wanted (or what I thought I wanted). Sometime on one of the many adventures I've had on Etsy over the last year and a half, I found this:


I mean it's for a bathroom... how funny and totally weird. LOL. Perfect. Love it. So in the back of my head the project lived, until two weekends ago when I finished my last name sign. I mean I already had wood, drills, tools, etc. out. Why not just finish the dang thing! But not too long ago I actually found inspiration that was SO. MUCH. BETTER. Etsy for the win again!

Sorry to the Etsy person that I stole this picture from. But on another note,
if you're interested in this project you can click on the links and BUY them :)
(see its really me promoting you...... not copy right infringement...) 
Here are so many other examples of what wonderful things you could create with ball jars and reclaimed (or seemingly reclaimed like mine...) wood!! I love everything about these creations. AND I was just recently given a bunch of Ball Jars to use from my cousin who gave them to her mom who gave them to my mom (thanks Amie, Aunt Polly and Mom!!).

I didn't take a single picture while I was creating this (dang it, dang it...ugh!). Once I found the right piece of plumbing pipe connector/adjuster band things at the store, it was really simple and not time consuming at all. Because of the shape of my ball jar, the metal piece was really far away from my background wood. A simple solution was to add a piece of scrap wood to the back for support.
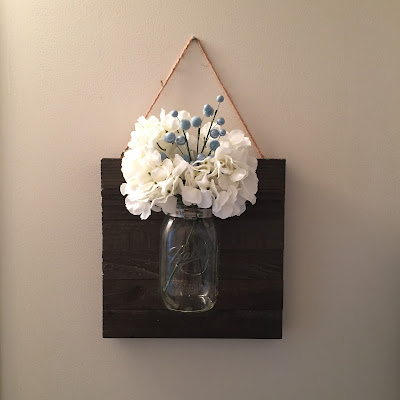


Finally got around to hanging it up!

My shower curtain matches so well!

Wednesday, February 22, 2017

Pinterest inspired Hanky Quilt

I saw the idea long ago on pinterest, bought various $1 handkerchiefs at walmart and held on to them for years! I finally got around to finishing it :) Here is the finished product:

each hankie has interfacing on the back

I decided to "tie" (sew small stitches everywhere) like I do for my quillows to make sure this piece stayed nice and flat.

nice warm fleece on the back

My sister came over last month shortly after I finished the blacket and fell in love with the colors. Welp, looks like I know what to give her this year! :)

Friday, February 10, 2017

Updates on Feed Sack/Trip Around the World Quilt

I bought this quilt almost a year ago from my guild's annual auction....


"My second quilt I picked up from the silent auction was this gem, for THREE DOLLARS. It is a really beautiful quilt top! It was advertised as a feed sack quilt, but after further review with my mom, we think it's more 50's style print. Either way, whoever created it did a great job of balancing the colors and transitioning to new colors.  I like the character it has as well. The creator used the fabrics they had, so one of the selections ends up in multiple places (at both the top and the bottom) to fill in where a pattern or two was lacking. I also like that this quilt is not too feminine or too masculine. I think I might adventure to finish this for myself! It would look wonderful in my navy blue and gray themed master bedroom. I have to decide whether I would need to add any more border to make this a queen sized quilt or not. Since it is just the topper I have a lot more room to play with what has already been made."

Though I decided not to add any more on to the edges like I originally thought I would, I'm still extremely happy with my purchase and what I ended up doing with it!

For almost a whole year, the topper sat next to my washing machine as a gentle reminder that I do need to wash this because what the heck is that odd smell? I finally got around to washing it in ohhhh October or so.

Then it sat around on my couch and in the "to be completed" projects pile for another couple
of months as I finished up all my Christmas presents I gave this year.

Then one day as I was fiddling around on the internet, I found out that someone did long arm quilting in my neighborhood! Kayci from American Quilting Services was so easy to work with and did a wonderful job! Within 10 days of initially contacting her she was able to meet up with me, get working on my quilt, and had it back to me!


We decided on an all-over pattern with contrasting thread color to give the
back design since the thread blended in to the front.

Then it sat around on my couch for another week until I could make myself sit on the floor to pin all the binding on... probably my least favorite despite the fact that it means the quilt is almost done!!

And then I got to do the fun part....
YAY FOR ALMOST FINISHED UFO's

AND THE FINISHED PRODUCT!

I love this quilting!!

So excited to have this new quilt to keep me warm!


Monday, January 23, 2017

Name Plaques

I decided at the last minute that I would add one more item to the list to make others for Christmas. I'd seen on pinterest those boards where you could put everyone from your family's names and birthdays hanging down from each month. 

This is the first one I found from Wayfair.com when I googled the concept.

However, set out to make a more personalized version of that!

I cut one 6ft piece of left over fencing (from our backyard project when we first moved into our townhouse)
into 3 different 2ft sections.

Next I stained the boards! I liked the different sizes and shapes of the letters,
but I didn't like that they were all different colors.

Spray paint to the rescue! I had all black and it made the most sense to make them all the same color
(and it was a lot easier on me....)

I had to figure out what the names would go on.
Luckily I found these thinner wooden nickel style cutouts at Michael's.

I bought a few bags and drilled two holes (one at the top and one at the bottom) for each of the wooden nickels.

then I attached jump rings to the top hole for what seemed to be hours.
I used rings that were anywhere from 7mm-10mm (aka the biggest sizes I could find).

Once I finished decorating each letter, I hot glued each piece to the main board. Because none of the letters are too heavy, that seemed to work just fine. I also hot glued 12 oval wooden cut outs for the months of the year (as relatively even as I could without measuring). Below each month is a screw eye. I drilled holes and screwed each in individually which was probably the most time consuming and most infuriating part of the whole process.

And here is ONE of the three finished products! I used anything and everything to decorate the letters. From burlap to lace to more thin wooden cutouts, nothing made it look cooler than the random details that were added to each one.


Wednesday, January 18, 2017

Sunflower wreath!

I had planned on making this one for myself, but somewhere in between me buying the supplies and Christmas, my sister found out and persuaded me to make it for her instead!

Because I made this while my partner and I watched tv and then finished the wreath as I watched Frozen on my first day of Christmas vacation..., I did not do a good job of taking pictures :( however, the steps are easy (also I followed a youtube video similar to this one)! I cut 10-12 inch sections of the yellow deco mesh (with my old rotary cutter and mat) and then gathered them in the center with a small piece of pipe cleaner. They don't have to be perfect because it is supposed to look messy. I cut the green pieces slightly larger and I probably could've done 18inches to make them stand out even more. I also wish I would've found dark green deco mesh rather than the lime green because the yellow and green blend together a little more than I would've liked.


I probably could've used a whole other role of yellow and make the sunflower more full since I had purchased a larger wreath form than I usually do. However, I made do with what I had since I bought these on sale a while ago and didn't want to spend any more on this than necessary.

Once I was finished with both the yellow and the green, I added burlap to the middle for the center of the sunflower. I simply gathered the burlap into sections (not to tight or neat, otherwise the insides of the wreath would show!).


My philosophy is that messy is best with deco mesh.

And here is the final project! This picture totally does not do justice to show the size of the wreath.

She wanted big and that is what I gave her! Merry Christmas sis.

Tuesday, January 17, 2017

Christmas Washcloth & Towel Sets

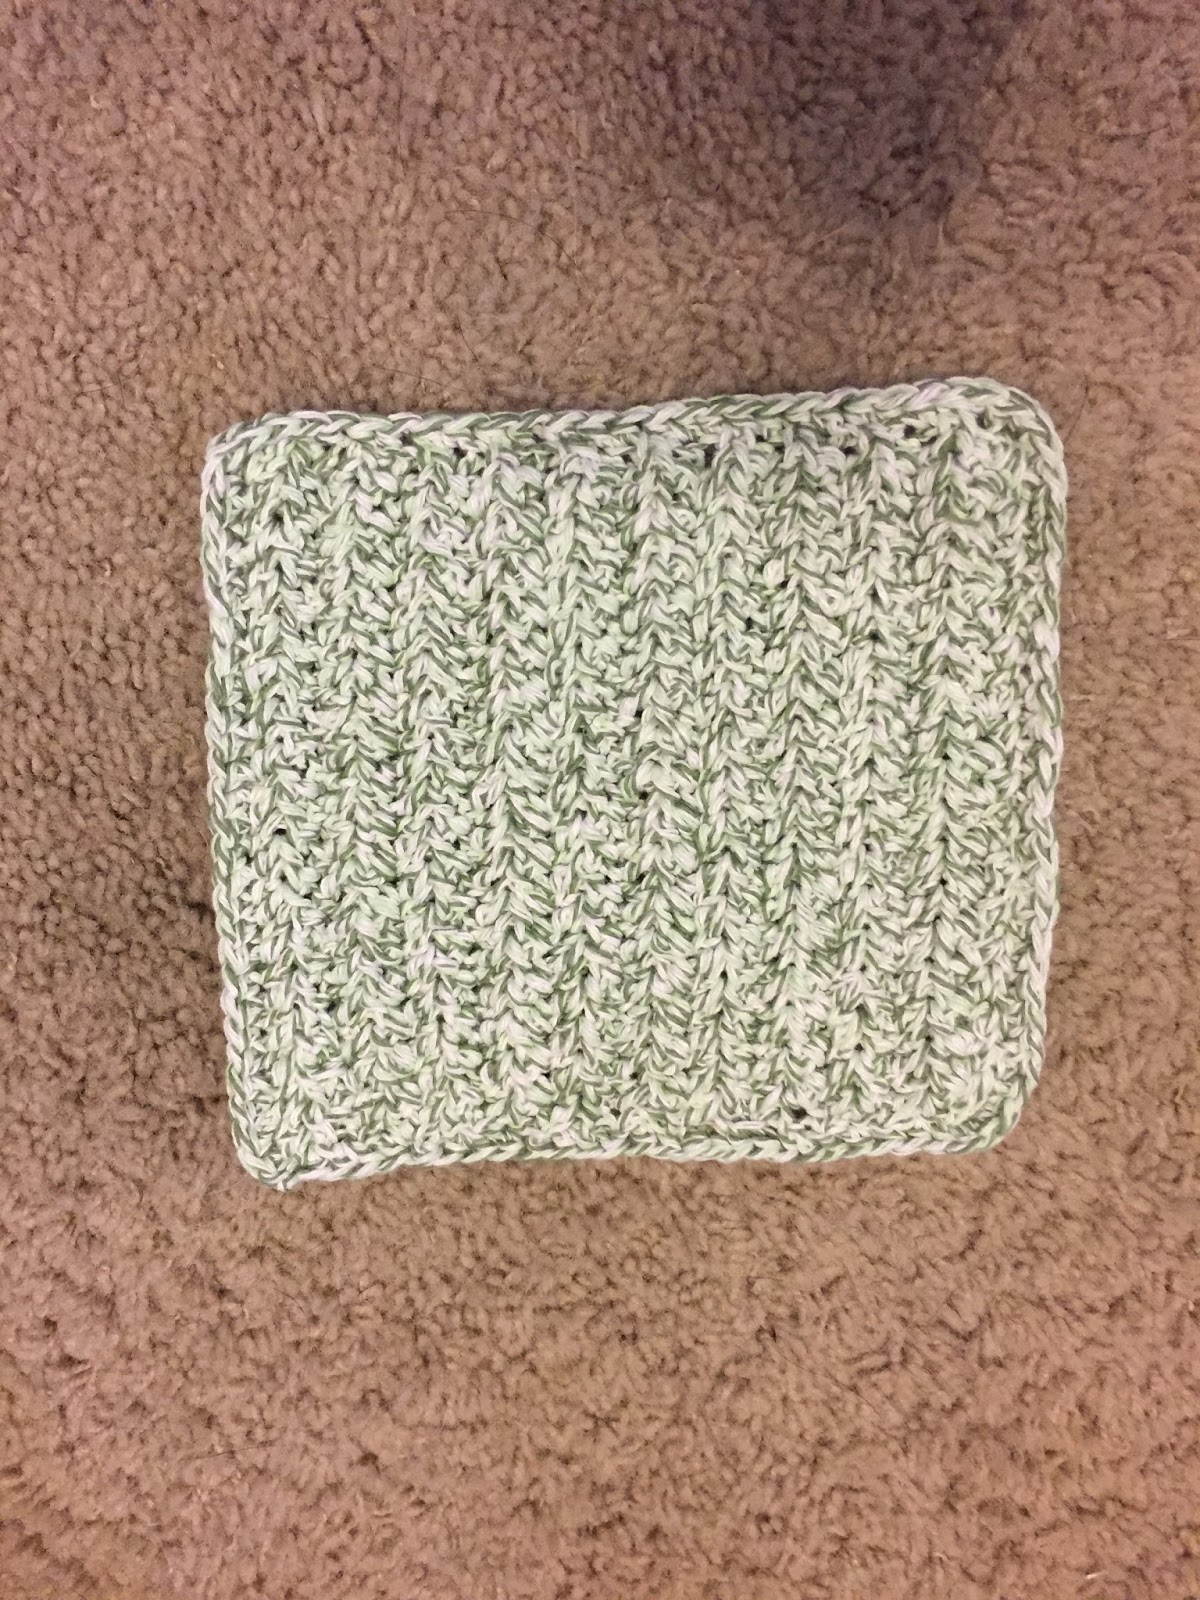
I decided to make washcloth, towel and potholder sets for some of my friends and family. I loved making crochet washcloths because it was a great way to work on my skills. When I started out, each potholder was a different stitch. This allowed me to work on some things that I may not have otherwise completed. If you are interested in any of the stitches I did, I have a whole pinterest board on crocheting and most of it currently consists of wash cloth patterns.

The finished products were fun and easy to make! (and even better once I actually figured out how to use my dang button hole stitch... much easier said than done with an old, sometimes less cooperative machine)

this pretty yellow has a finished picture down at the bottom!

I never actually finished this, so maybe they'll get it next year haha :)

this washcloth didn't have a matching towel but I love the colors so much anyway :)

I didn't think I'd like this towel combo but it fits in so well with the mug rug below!


There were two sets of this green color since it worked with two people's kitchens


because everyone needs some NFL dish towels, yes?


TADA! Hopefully the are well used :)